【超簡単!!】VMware移行ツール!VMware vCenter Converter Standaloneの使い方!!
初めに
- VMwareを使用したい!!けど今まで使っていたPC、Serverがある。
- 使っていたPCやServerを仮想化したい。
- Vmware のGuest OSの容量を減らしたい。
そんな時はVMware vCenter Converter Standaloneを使用すればすぐに仮想化することができます。
またサーバーのリプレイスを行う際にOSの移植を考えたり、
既存のサーバーに移行したいなんてことがあるかもしれません。
そんなときに移行先のOSがVMwareなら簡単にあるToolを使用すること移行することができます。
VMware vCenter Converter Standaloneとは
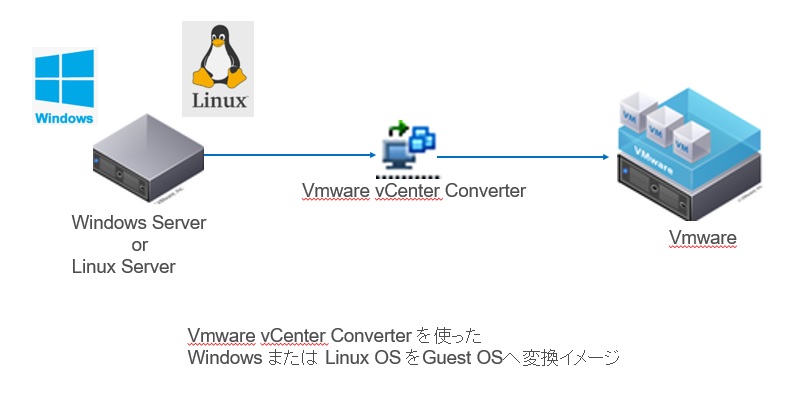
VMware vCenter Converter Standalone は、Windows および Linux の複数のデスクトップやサーバのエディションを含む、さまざまな種類の物理マシンを仮想マシンに変換できます。
Hyper-V や KVM など、サードパーティ製の仮想マシンの変換もサポートしています。
手順
今回はWindows OS(物理マシン)をVmware のGuest OS(仮想マシン)に変換する手順をご紹介します。前提としてWindows OSとVMwareがインストールされている環境が必要になります。
- VMware vCenter Converter Standaloneの入手
- Vmware Converter StandaloneのInstall
- Vmware Converter Standaloneの移行作業
1.VMware vCenter Converter Standaloneの入手
VMware社のDownLoadページからWindows OS 内にDLできます。
⇒https://my.vmware.com/group/vmware/downloads/info/slug/infrastructure_operations_management/vmware_vcenter_converter_standalone/6_2_0
DLにはVMware アカウントが必要になります。
無料なので登録しましょう。
2.Vmware vCenter Converter StandaloneのInstall
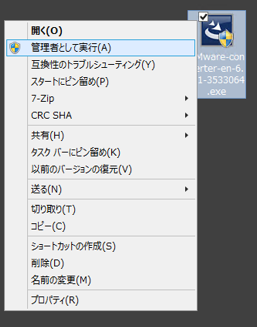
2.1取得したexeファイルを管理者として実行します。
実行後は基本そのままインストールします。(パスなどの変更ある場合は適宜お願いします)
インストールができない場合はこちらをご参照ください。
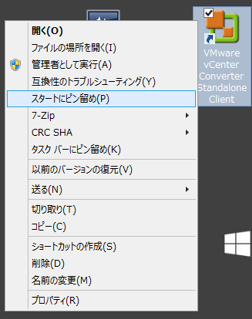
2.2インストール後、ショートカットが生成されるので管理者としてVmware vCenter Converter Standaloneを実行します。
3.Vmware vCenter Converter Standaloneを使った移行作業
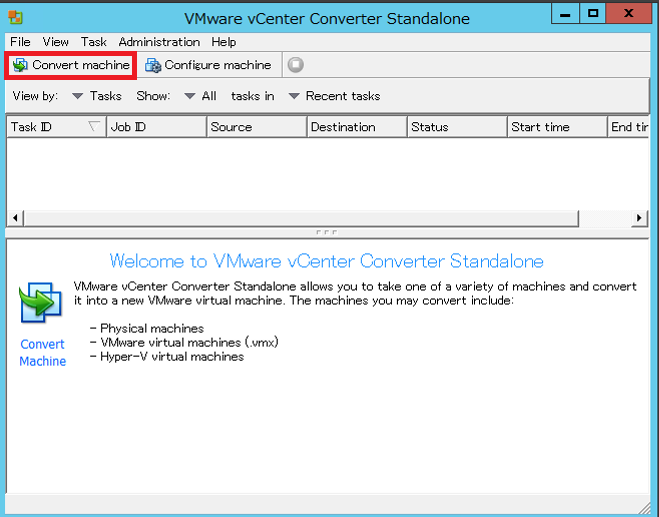
3.1 Vmware vCenter Converter Standaloneの画面が立ち上がってくるので”Converter machine“をクリックします。
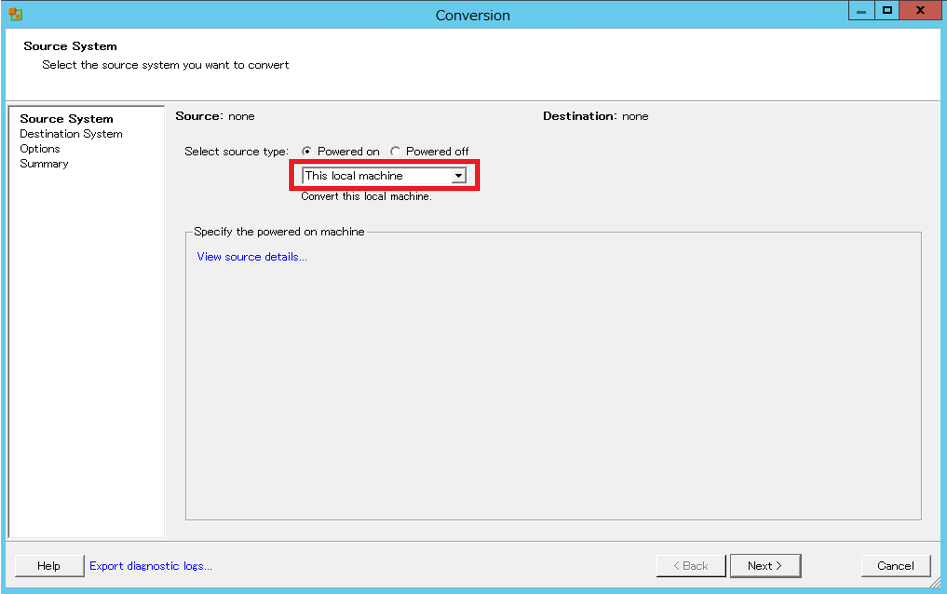
3.2 Conver画面が開き”This local machine“を選択します。
“This local machine“とはWindows OS(converterが入っているマシン)のことを指しています。
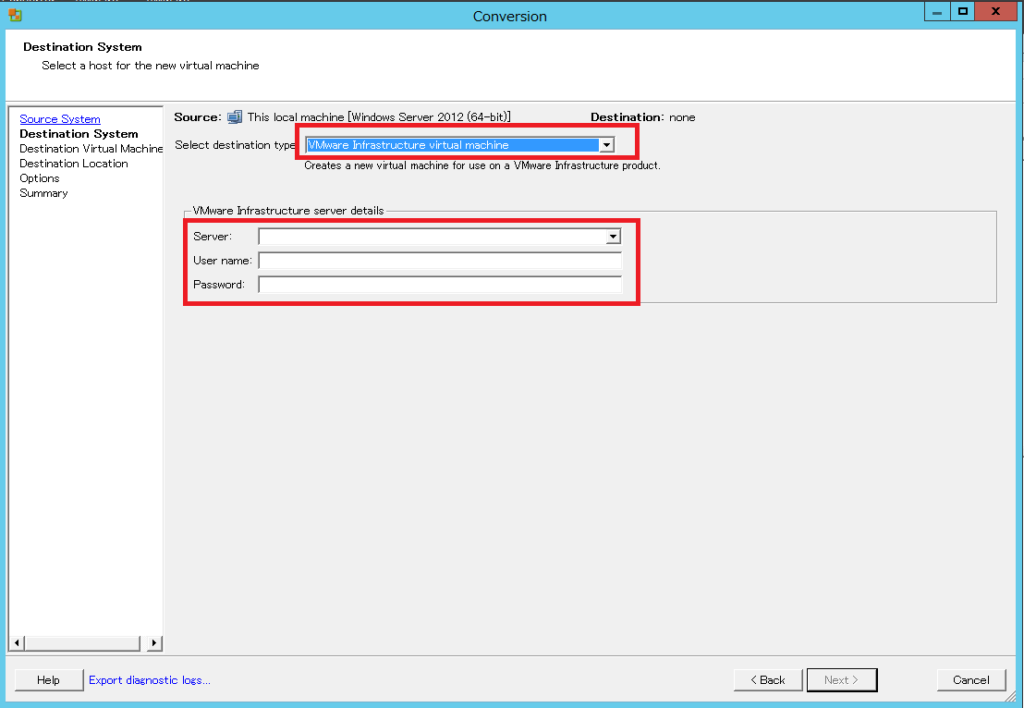
3.3 “Select destination type“を”VMware Infrastructure virual machine“に設定(Workstationなどを使用しているときは”Vmware Workstation or other VMware virtual match“を選択します)
設定後は移行したいVmware の”IPアドレス”と “User name”と”Password”を入力します。
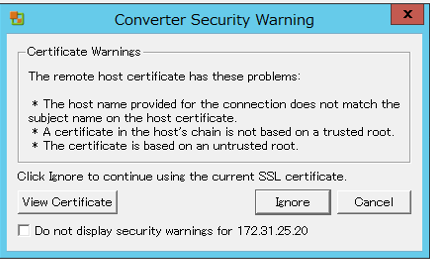
3.4 “Converter Security Warning“の画面が出てきますが”Ignore“を選択します。(SSLを使った通信を行いたい場合はSSLの証明書が必要となります)
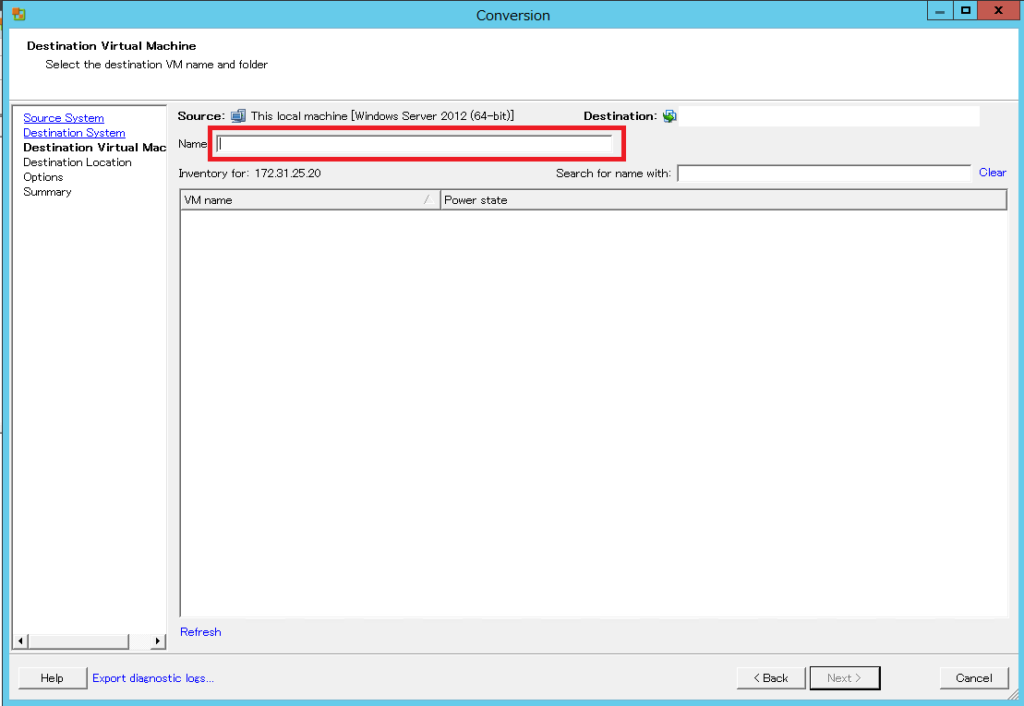
3.5 Guest OSのNameを入力します。
3.6 移Guest OSを保存する”Datastore”と”Virtul machine version”を選択します。

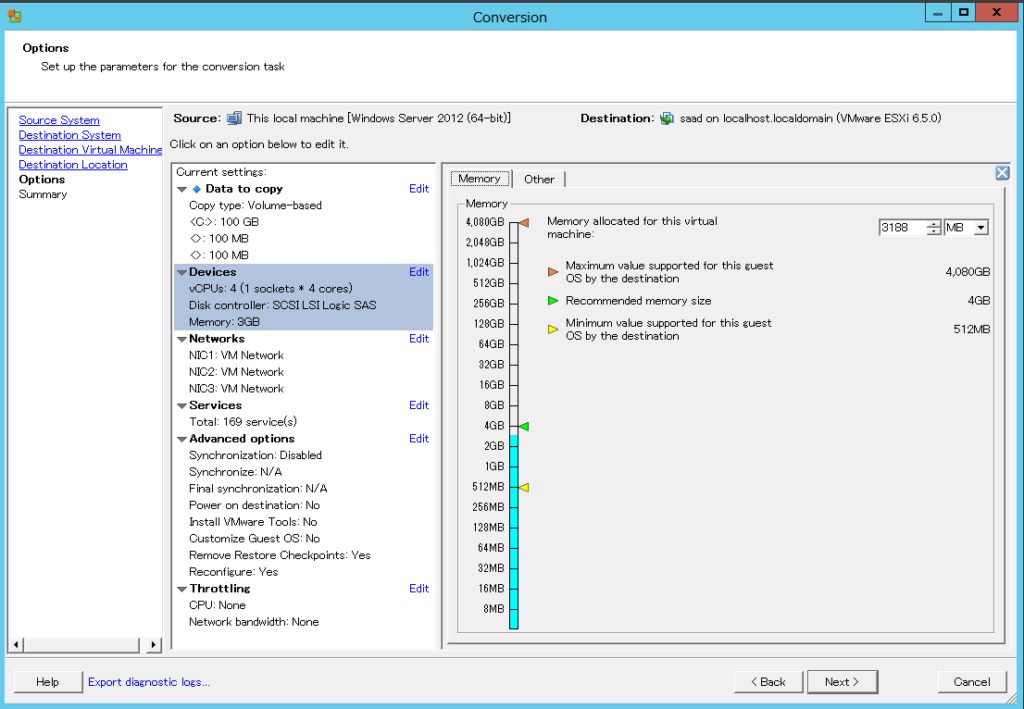
3.7 option画面で”DISK”、”CPU”、”メモリ”、”NIC”などの設定を行います。
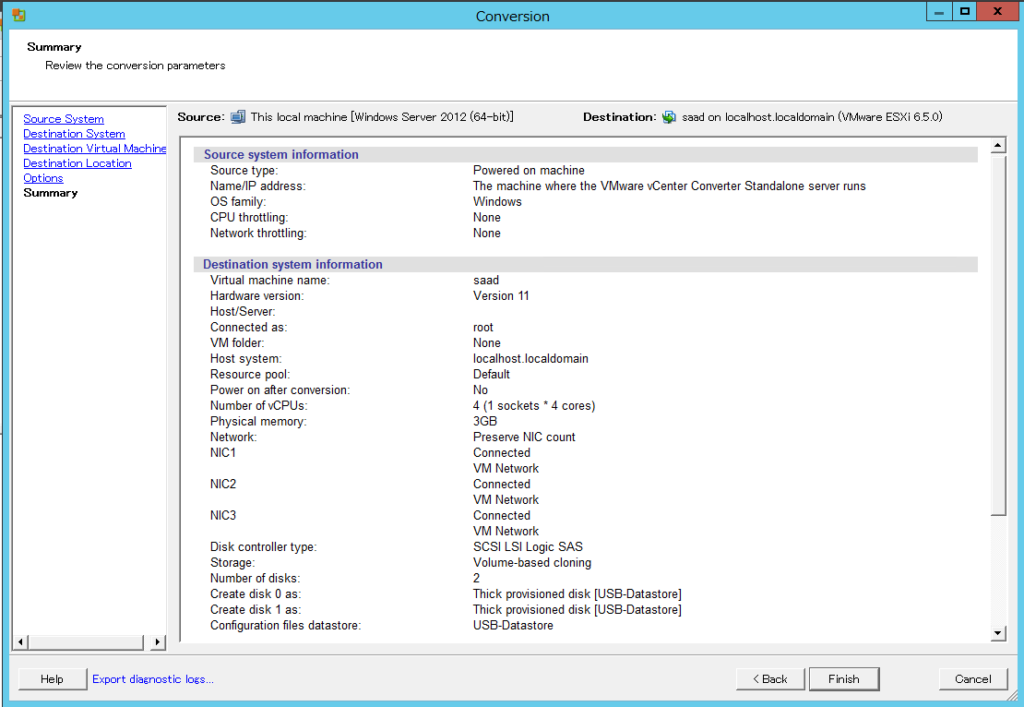
3.8 確認画面が出てくるので問題なければ”Finish”!!
3.9 するとタスクが作成されるので”Status“が”Completed“になるまで待ちます。
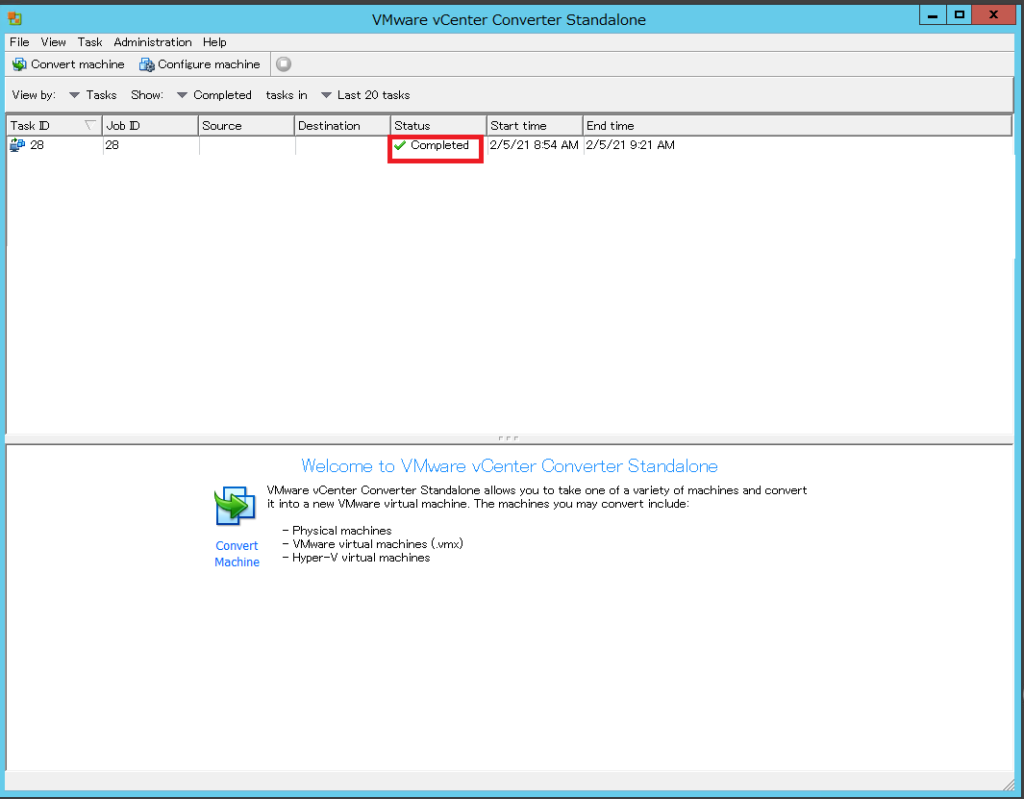
3.10 移行先のVMware サーバ内にGuest OSが作成されているはずです。
3.11 Guest OSを立ち上げてみて使用できることを確認してみてください。
Guest OSが立ち上がらない場合は下記参考ください。
注意点
Guest OSを立ち上げた際にIPアドレスがバッティングする可能性があります。そのため、ネットワークの設定を行ってから立ち上げるなどしてください。
-
前の記事

【公園情報】大和ゆとりの森 わんぱく広場 2021.02.14
-
次の記事

【VMware vCenter Converter Standaloneがインストールできない場合】 2021.02.17